 |
| Click here to visit Amazon |
Thursday, December 2, 2010
Electronics are the #1 gift this year. Browse below!
Why not get you and your entire family a really great gift this Christmas? Instead of buying many small, maybe under-appreciated gifts for each member of the family, why not buy a single, large family gift that everyone in the house can enjoy? Just a thought. Check out these deals below:


Saturday, November 20, 2010
Colorful Angel Christmas Decoration I
Here's a really cute and easy craft to help decorate your home in time for the Christmas holidays. This looks really quick and even a novice crafter can work with styrofoam, so there is no excuse not to try this! I found this tutorial at FaveCrafts.com, so please visit them and check out some of the other wonderful ideas to help make this a happy holiday!
With inexpensive foam materials and foam paint, create a this lovely Christmas angel. The colorful angel is perfect as a table-top decoration or mantel piece.

Materials:
Steps:
®™ Trademark of The Dow Chemical Company ("Dow") or an affiliated company of Dow. For more project ideas, please see styrofoamstyle.com.
If you like this project, we also suggest:
Colorful Christmas Angel Decoration II
Americana Angel
Materials:
- STYROFOAM Brand Products:
- Sheet: 1" x 12" 18"; 1/2" x 12" x 18"
- Ball, 2"
- Wooden dowels: 1/4" x 9"; 1/8" x 2"
- One gold Chenille stem
- Two 6mm black beads
- Acrylic craft paint: metallic gold, ruby, blue, emerald, barn red, peach, pink, brown
- Fineline marker
- Serrated knife or utility knife
- Old candle
- Paintbrush
- Low temperature glue gun and glue sticks
Steps:
- To cut foam sheets, use serrated knife or utility knife; wax knife blade first for smoother cuts. From 1" foam sheet, cut 8" x 3-3/4" rectangle for angel's dress and 5" x 7" oval for base. Using patterns, cut two feet and heart (wings) from 1/2" sheet. Cut foam ball in half. (NOTE: bold lines on pattern are cutting lines, fine lines are decorative glue lines.)
- Glue half-ball on wings; glue wings to dress. Glue feet to gown as shown, with one foot positioned on top and in front of the of other; when gluing, insert toothpick between feet and dress for enhanced hold.
- The golden highlights on the angel are created with low temperature glue. Using black, fineline marker, transfer design lines onto dress, shoes and wings. (Do not draw face and hair.) Draw wavy line around edge of base; add dots to top of base. Practice gluing technique on scrap of foam; squeeze glue gun in steady, controlled manner to create fine, even lines. Trace over design lines with glue. Let dry.
- Paint dress, wings and base following colors used in photo. Let dry. Paint all glue lines and dots on gown, wings and shoes with two coats of gold paint; paint wavy line around base gold and dots on base barn red. Paint dowels gold.
- Glue beads to face for eyes, pressing into foam. Using low temperature glue, make a small dot for nose and two larger dots for cheeks; when glue is almost set, press cheeks with fingers to flatten. Paint nose gold and cheeks pink. Paint red smile.
- Make hair with glue, adding glue in several layers to build height. Before hair is completely dry, insert small dowel in top of head. Paint hair brown. Bend 4" chenille stem into circle; glue to top of dowel to make a halo.
- Insert large dowel into center of base; remove dowel, fill hole with glue and replace dowel. Repeat, pushing dowel into center bottom of gown.
®™ Trademark of The Dow Chemical Company ("Dow") or an affiliated company of Dow. For more project ideas, please see styrofoamstyle.com.
If you like this project, we also suggest:
Colorful Christmas Angel Decoration II
Americana Angel
Thursday, November 18, 2010
More Black Friday Ads!
This year Target is kicking off Black Friday on Sunday with a huge pre-Black Friday sale. We just received a copy of the sales circular and wanted to share some of the items in it. One of the best deals we could find in this circular is on an Acer 10.1" Netbook with 1GB of memory, a 160GB hard drive, and Windows XP. You will be able to get this during Target's 4-day pre-Black Friday sale for only $179.99 saving $50 off the normal retail price. While this netbook is significantly dated compared to current models on sale this year, it's still one of the lowest prices we've seen so far. Another deal you will find in this ad is the Nintendo DSi gaming console for only $119.99. These typically retail for $149.99, so if you're on the market to buy this console, we suggest doing so during this early Black Friday sale.
View the Target 4-Day Pre-Black Friday Ad Black Friday ad:
http://www.black-friday.net/bf/target-4-day-pre-black-friday-sale-black-friday.html
View the Acer 10.1" Netbook for $179.99:
http://www.black-friday.net/follow/4879
View the white Nintendo DSi gaming console for $119.99:
http://www.black-friday.net/follow/4896
To see even more check out www.black-friday.net
Tuesday, November 16, 2010
Are you ready for Black Friday?
We all know that the day after Thanksgiving is the biggest shopping day of the Christmas season. Well, here are some of the Black Friday Ads:
Harry & David Black Friday ad:
http://www.black-friday.net/bf/harry-and-david-black-friday.html
Joann Fabrics Black Friday ad:
http://www.black-friday.net/bf/joann-black-friday.html
PepBoys Black Friday ad:
http://www.black-friday.net/bf/pepboys-black-friday.html
HH Gregg Black Friday ad:
http://www.black-friday.net/bf/hhgregg-black-friday.html
ShopKo Black Friday ad:
http://www.black-friday.net/bf/shopko-black-friday.html
Tractor Supply Company Black Friday ad:
http://www.black-friday.net/bf/tractorsupply-black-friday.html
Modell's Black Friday ad:
http://www.black-friday.net/bf/modells-black-friday.html
Navy Exchange Black Friday ad:
http://www.black-friday.net/bf/navy-exchange-black-friday.html
Also, tomorrow Walmart will be having another pre-Black Friday electronics sale. They plan to offer a LG BD530 Blu-ray Disc Player for $65 along with other discounts on HDTVs and Blu-ray movies. Right now the Walmart sale page lists the products at their normal retail price. We expect this to be updated very early in the morning on Wednesday when the sale begins.
View the Walmart.com Amazing Electronics Sale Event on Wednesday:
http://www.black-friday.net/follow/4794
View the Walmart.com Amazing Online Specials:
http://www.black-friday.net/follow/3808
View the Menards Black Friday ad:
http://www.black-friday.net/bf/menards-black-friday.html
Over the weekend we also added copies of the AJWright, BJ's, and Zales Black Friday ads to the site and you can find links to them below.
View the AJWright Black Friday ad:
http://www.black-friday.net/bf/ajwright-black-friday.html
View the BJ's Black Friday ad:
http://www.black-friday.net/bf/bjs-black-friday.html
View the Zales Black Friday ad:
http://www.black-friday.net/bf/zales-black-friday.html
Monday, November 15, 2010
Dorset Button Christmas Decoration
Here is another easy, quick Christmas craft that you can do while watching television. But, you end up with really lovely tree ornaments! Enjoy.
I found this tutorial at Trishalandesigns.

I made them for a Blog Swap.

In the original post I briefly explained how I made them.

And then finished the post with a promise to post a step by step tutorial.


Step 5: repeat this step a couple of times then cut off the excess tail.

Step 6: Repeat this step until the entire ring is covered. Make sure that you roll the 'knot' to the inside.

Keep going.

Just a little bit further.

Step 7: Now we are going to make the spokes. I thread the needle (with this thread) before starting this step as its easier than stopping a doing a bit later. Wind the thread around the outside of the ring, down the front side, around the back. You need to be careful here that the point where the threads cross on the top is centred. Ignore the back for the time being.

Step 8a: The photo below shows and even number of spokes on the top. You need an odd number.

Step 8b: Bring the thread from the back onto the front side. Instead of winding completely around push the needle down to the back at the half way point.
Step 9: Now you are going to secure the centre point and at the same time bring the back threads into alignment with the top threads. With the needle threaded criss cross across the centre point pulling the back threads into place as you go. Continue until all are aligned. This is important. If you don't make sure that they are aligned before beginning weaving your button will be off centre. Try and keep the centre neat but don't stress too much as it can be covered by beads or sequins.

Step 10: Now we are going to starting filling in the centre. This is a basic over, under weave. This is why you needed an odd number of spokes. I always start at the top near the scew eye.

Under

Continue over, under until you get back to the top. The odd number automatically makes sure that the next time around the moves are the opposite.

Step 11: Now is when you get to start to personalise you decoration. There is no need to completely fill in the centre. You can see by the samples that I decorated all differently.

I sewed beads on to the front.

Don't forget the back.It will be seen hanging on the tree. Add some ribbon through the screw eye and pop it onto your tree.

I found this tutorial at Trishalandesigns.

I made them for a Blog Swap.

In the original post I briefly explained how I made them.

And then finished the post with a promise to post a step by step tutorial.

As we are all starting to think about the holidays now is a good time to deliver on my promise.

Step 1: You will need a wooden curtain ring with the screw eye attached. Thread, tapestry needle, beads(optional), ribbon to hang.

Step 2: How much thread you will need depends on how big the curtain ring is and how much filling of the centre you plan to do and type of thread. For the orange one I used 2.5 skeins of Stranded Cotton. Unravel the skein so the thread pulls freely. Hold the tail of the thread as in the picture.

Step 3: Make a loop over the tail of the thread. Pull the remaining thread through the loop (imagine a button hole stitch).

Step 4: Pull the "knot' firmly capturing the tail of the thread securely.

Step 5: repeat this step a couple of times then cut off the excess tail.

Step 6: Repeat this step until the entire ring is covered. Make sure that you roll the 'knot' to the inside.

Keep going.

Just a little bit further.

Step 7: Now we are going to make the spokes. I thread the needle (with this thread) before starting this step as its easier than stopping a doing a bit later. Wind the thread around the outside of the ring, down the front side, around the back. You need to be careful here that the point where the threads cross on the top is centred. Ignore the back for the time being.

Step 8a: The photo below shows and even number of spokes on the top. You need an odd number.

Step 8b: Bring the thread from the back onto the front side. Instead of winding completely around push the needle down to the back at the half way point.
Step 9: Now you are going to secure the centre point and at the same time bring the back threads into alignment with the top threads. With the needle threaded criss cross across the centre point pulling the back threads into place as you go. Continue until all are aligned. This is important. If you don't make sure that they are aligned before beginning weaving your button will be off centre. Try and keep the centre neat but don't stress too much as it can be covered by beads or sequins.

Step 10: Now we are going to starting filling in the centre. This is a basic over, under weave. This is why you needed an odd number of spokes. I always start at the top near the scew eye.
Over.

Under

Continue over, under until you get back to the top. The odd number automatically makes sure that the next time around the moves are the opposite.

Step 11: Now is when you get to start to personalise you decoration. There is no need to completely fill in the centre. You can see by the samples that I decorated all differently.

I sewed beads on to the front.

Don't forget the back.It will be seen hanging on the tree. Add some ribbon through the screw eye and pop it onto your tree.
Monday, November 8, 2010


Friday, November 5, 2010
Clay Angel Ornament By: Diana Crick for AMACO
Here's a really cute ornament made from polymer clay. This is from FaveCrafts.com so please visit them to find many other wonderful Christmas crafts tutorials.
Create a polymer clay angel ornament to add a homemade touch to your next Christmas tree.This angels holds red and white candy canes for a bit of holiday color.

Materials:
Create a polymer clay angel ornament to add a homemade touch to your next Christmas tree.This angels holds red and white candy canes for a bit of holiday color.
Materials:
- FIMO® Soft Polymer Clay (2 oz. blocks) — White (2), Cherry Red (1), Flesh Light (1), and Caramel (1)
- AMACO® Polymer Clay Template (I looked everywhere at the AMACO website and could not find this template--however looking at the picture, making this without a template should not be too difficult even for the beginner)
- FIMO® Gloss Lacquer
- Heart-shaped cookie cutters or rubber stamps — 13/4" and 21/4"
- Heart cutters — 3/16" and 1/2"
- Scallop-edged scissors
- Fun Wire™ Pearlized Gold, 24-gauge
- 22-gauge floral wire
- Gold elastic cord
- Powder blush
- Eye pin
- White acrylic paint
- Ball stylus
- AMACO® PolyRoller or Pasta Machine
- Ceramic tile for work surface
- X-Acto® knife
- Club-shaped or flower-shaped canapé cutter (1/2")
- Darning needle
- Small gold beads
- Unlined index cards
- Pearlescent glitter
- Read template instructions and tips. Write the following headings on an index card: Dress; Wing; Collar; Sleeve; Head; Neck, Hand, Feet; Candy Cane; Red Hearts; and Gingerbread Men. Leave a two inch space under each heading to place the clay balls. Tip: If you are going to make lots of angels, laminate the card for re-use.
- Cut the quantity of clay needed for specific ball sizes. This is easy with the template and drawings that come with it. With the White FIMO® Soft make the following size balls: one 11/8" ball for dress, one 11/8" ball for the wing, one 7/8" ball for the collar, two 5/8" balls for the sleeves. With the Flesh Light FIMO® Soft make one 7/8" ball for head and one 5/8" ball for the neck, hand, and feet. For the candy cane make one 5/8" ball with the Cherry Red FIMO® Soft and one 5/8" ball with the White FIMO® Soft. Make one 1/2" ball of Cherry Red FIMO® Soft for the red hearts. For the gingerbread men make one 7/8" ball of the Caramel FIMO® Soft. Place each piece of clay on the card in its place.
- Condition each piece separately by kneading with your hands to soften. Roll into a ball using the template for measuring the diameter and place back on card. Do Flesh Light first, then White, Caramel, and finally, Cherry Red. Wash hands between colors with cool water and soap.
- CANDY CANES: Roll the White ball into a log 4" long using the ruler on the template then cut in half. Repeat with the Cherry Red ball. Twist a red and white log to make cane. Smooth and curve top. Repeat with other red and white logs.
- RED HEARTS: Flatten the Cherry Red ball between your hands into a pancake. Roll out flat and cut lots of 3/16" hearts (you can use the extras in future projects).
- GINGERBREAD MEN: After flattening and rolling Caramel ball, cut lots of club shapes or flowers. If you’re using a club cutter, slice bottom stem to make legs. Make a small hole in each “arm” with a darning needle for threading the elastic cord after baking.
- Pre-bake canes, hearts and gingerbread men for 15 minutes at 265°F (129°C).
- DRESS: Flatten White ball into a pancake a little larger than the heart stamp or cookie cutter then roll out to about 1/8" thick. Press stamp or cutter into clay then cut out with scissors. Top of dress is the point of the heart. Make small box pleat to gather upper part of dress slightly.
- SLEEVE: Roll each White ball into a long cone shape (21/4"). Press fatter end of cone on work surface gently to flatten end. Trim off narrow end so sleeve is 13/4" long. Lay along heart with narrow end at top of dress.
- COLLAR: Flatten White ball into a pancake a little larger than the 13/4" stamp then roll out. Press stamp or cutter into clay then gently lift from work surface and cut out with scallop-edged scissors. Lay heart-shaped collar over dress and shoulders, folding point of heart 3/4" over to back of dress. Press the pre-baked heart in place.
- NECK, HANDS, FEET: Flatten and roll out the Flesh Light ball then cut out four 1/2" hearts. Roll three into three separate balls. Place the fourth underneath the indentation at dress bottom, leaving curves to show as toes. Press dress firmly onto feet. Press one ball down to flatten slightly then press onto collar to form neck. Set the other two balls aside.
- HEAD: Re-roll Flesh Light ball to soften. Push a one inch piece of florist wire into head where it will join the neck. Gently lift the angel and press the head down onto the neck making firm contact. Pierce two holes for eyes. TIP: If you are right-handed, make the left eye first for ease in alignment. Powder cheeks with blush.
- HAIR: Cut ten 21/2" lengths of Pearlized Gold Fun Wire™. Bend each into a “U” shape, cross wires over and pull ends in opposite directions. This will form a loop like a seagull. Hold the middle loop between your thumb and index finger of your left hand. With your right hand, smooth wires down to meet and form bottom of heart. Twist ends together and cut off excess. You only need a 1/4" tail. Make ten or more. Why more? They won’t all be the same size and if you have more, you can choose the five that are most alike. Press them into head, placing the most nearly perfect one on top.
- HALO: Cut a 41/2" length of Pearlized Gold Fun Wire™ and bend it around the bottle of FIMO® lacquer to shape. Draw wire together tightly. Hold wires together and turn bottle, not the wires, to form tail. Trim tail to 1/4" and insert into head about 1/4" back behind the top wire heart. Trim the eye pin to 1/2" and push into head just behind the halo. Turn the opening of the eye pin so that the elastic will thread through from side to side and angel will hang straight.
- WINGS: Follow step 8 for dress, but omit pleat. Press four pre-baked hearts into wing. Lift angel onto wings, placing head in center of heart. Gently press head to make firm contact with wing. Slide X-Acto® knife gently under whole sculpture to ease it off the work surface. Press bottom of wing to make contact with back of collar. Lay angel down.
- HANDS: For gingerbread angel, press a small ball of Flesh Light FIMO® Soft to bottom of each sleeve. Pinch ball at free end to flatten and create fingertips. Twist darning needle into hand to make a hole for threading through garland. For candy cane angel, press a small ball of Flesh Light FIMO® Soft to bottom of each sleeve. Place two candy canes on dress. Lift sleeve across canes to hold them in place. Press hand onto candy cane. Second hand is just like gingerbread angels’, but with no hole.
- Bake angels at 265°F (129°C) for 40 minutes. Turn oven off but leave angels in until they are thoroughly cooled.
- Use White acrylic paint and ball stylus or end of small paint brush to make dots on cheeks, toes, and hands. Decorate gingerbread men as shown in photograph. Re-dip for each dot so they will each be the same size.
- Glaze gingerbread men with FIMO® Gloss Lacquer. When dry, thread them onto gold elastic cord in this order: gold bead, man, two beads, man, two beads, man, last bead. Thread one end of cord up through one hand and the other end up through the other hand. Make an over hand knot in the cord, guiding the knot down close to the top of the hand using the point of the darning needle. Trim excess cord. Thread piece of gold elastic through the eye pin as a hanging loop.
- Sprinkle glitter onto wax paper. Brush back of angel with lacquer and lay the angel down onto the glitter to coat back and hide any imperfections. Let dry; apply another coat of lacquer to seal glitter. NOTE: Never use clear nail polish on polymer clay. Within a few months it will become very sticky.
Tuesday, October 26, 2010
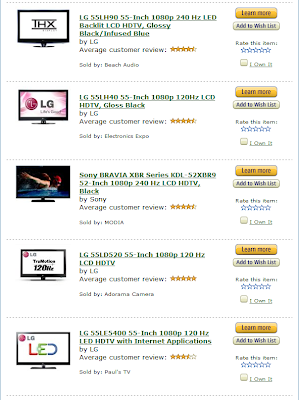
Televisions are becoming more competitively priced!
This year for Christmas, think about getting that new flat screen television that you always wanted. The prices are gradually declining and now these televisions are within the budget of just about anyone. Amazon offers low prices and great delivery. Check out these bargains.


Friday, October 15, 2010
Christmas Piñatas
Here's a quick and inexpensive tutorial for making Christmas pinatas. Make several and decorate the tree with gifts, or make a group to give as gifts to friends and acquaintances. These look simple and easy, so you have time to make plenty. This also looks like a fun craft to make with the kids!
This was discovered on AllCrafts.com.

I have been wanting to make little papier-mâché Piñatas for such a long time after seeing them on Not Martha, and Christmas seems like the perfect time to make these little balls filled with sweets or toys. They are easy to make with young ones, and fun to find fillings for. Children will enjoy pulling them apart and seeing what’s inside, and everyone will enjoy making them and seeing them hung up around fireplaces, on trees, or clustered on a door or shelf.
With a simple flour and water paste* mixed to a smooth gloopy consistency and papier-mâché strips of tissue paper around semi blown up balloons of about 10-15cm diameter.

Leave a gap around the top as your opening – enough to get goodies inside.

Leave to dry till the case is hard, and then deflate the balloon by pricking it or cutting it with scissors (it won’t pop, but will let air out slowly as it removes itself from the inside of the papier-mâché case).

Once you have the empty shell, you can fill with whatever you like – small bags of sweets, toys, biscuits, glitter or cut out pieces of paper, small puzzles to put together, or even write out your own jokes to tell.

Then take another piece of tissue paper and a length of ribbon and seal the opening with more flour/water paste.

Have fun decorating! Finally add a small tag to the ribbon which says ‘Pull Me’ to help open.

Pull open, and enjoy!
* For those with gluten or wheat allergies, the following alternatives to wheat flour can be used: Tapioca flour, rice flour. Experiment with other flours to see if they work, or alternatively use a white paste with PVA craft glue watered down, however I tried here to limit the amounts of glue being used in the whole project. You may want to add some salt to the paste to prevent mould as well.

This was discovered on AllCrafts.com.
I have been wanting to make little papier-mâché Piñatas for such a long time after seeing them on Not Martha, and Christmas seems like the perfect time to make these little balls filled with sweets or toys. They are easy to make with young ones, and fun to find fillings for. Children will enjoy pulling them apart and seeing what’s inside, and everyone will enjoy making them and seeing them hung up around fireplaces, on trees, or clustered on a door or shelf.
With a simple flour and water paste* mixed to a smooth gloopy consistency and papier-mâché strips of tissue paper around semi blown up balloons of about 10-15cm diameter.
Leave a gap around the top as your opening – enough to get goodies inside.
Leave to dry till the case is hard, and then deflate the balloon by pricking it or cutting it with scissors (it won’t pop, but will let air out slowly as it removes itself from the inside of the papier-mâché case).
Once you have the empty shell, you can fill with whatever you like – small bags of sweets, toys, biscuits, glitter or cut out pieces of paper, small puzzles to put together, or even write out your own jokes to tell.
Then take another piece of tissue paper and a length of ribbon and seal the opening with more flour/water paste.
Have fun decorating! Finally add a small tag to the ribbon which says ‘Pull Me’ to help open.
Pull open, and enjoy!
* For those with gluten or wheat allergies, the following alternatives to wheat flour can be used: Tapioca flour, rice flour. Experiment with other flours to see if they work, or alternatively use a white paste with PVA craft glue watered down, however I tried here to limit the amounts of glue being used in the whole project. You may want to add some salt to the paste to prevent mould as well.
Wednesday, October 13, 2010
Hot Christmas Toys – Toys”R”Us Announces Latest Toy Trends For Christmas 2010
If you need some help deciding what to buy your kids this year, why not take advice from the number one retailer of toys in the US? Here is their latest trend announcement for Christmas 2010:

Toys”R”Us recently announced the latest toy trends which are expected to dominate kids’ wish lists as well as the purchasing decisions of individuals purchasing gifts during the upcoming Christmas season. These trends and lists were compiled following an extensive review of data regarding the popularity of toys, which were obtained from Toys”R”Us stores throughout the United States as well as from Toys”R”Us stores in over thirty other countries in which the company operates. Amongst the toys that were expected to be popular this season were cute collectibles, 18-inch dolls, as well as train sets, which have recently regained popularity.
Commenting at the release of these latest toy trends, Karen Dodge, who is the Senior Vice President as well as Chief Merchandising Officer of Toys”R”Us, Inc., said: “As the world’s leading global specialty toy retailer, Toys”R”Us has unique insights into the types of toys that are capturing kids’ interests. It’s no surprise that the trends we’ve identified are also reflective of some of this season’s hottest toys, such as Squinkies, Disney Princess & Me dolls and Tomica trains. Understanding what makes a toy magical to a child and will have them saying, ‘WOW,’ on Christmas morning is the first step for parents and gift-givers as they prepare for the holiday shopping season.”
Found at Star Global Tribune
Tuesday, October 12, 2010
Amazon.com: Top 10 Deals in Electronics This Week
Here are the top 10 bargains at Amazon.com :
:
 Click here to visit the site and find other wonderful Christmas gifts, too.
Subscribe to:
Posts (Atom)